

We all want to save a little money, right? If you’re new to boxing or kickboxing or you’re on a tight budget, and you are not ready to commit to spending $150-$300 for a good quality punching bag, here’s a solution for you. Make your own!
Here I’ve laid out the steps for making your own free standing and hanging punching bag. If you need help deciding on the best type of punching bag (hanging or free standing) click this link to read this article first.
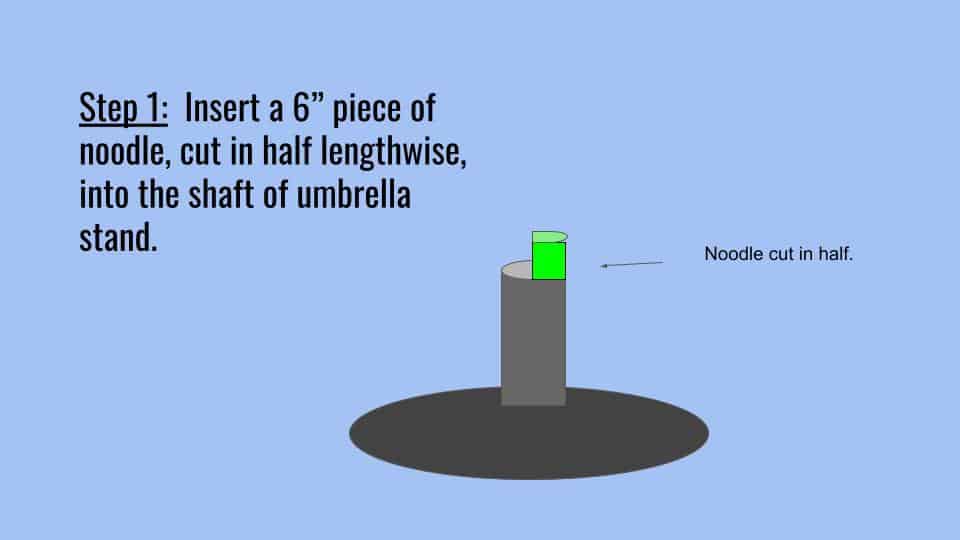
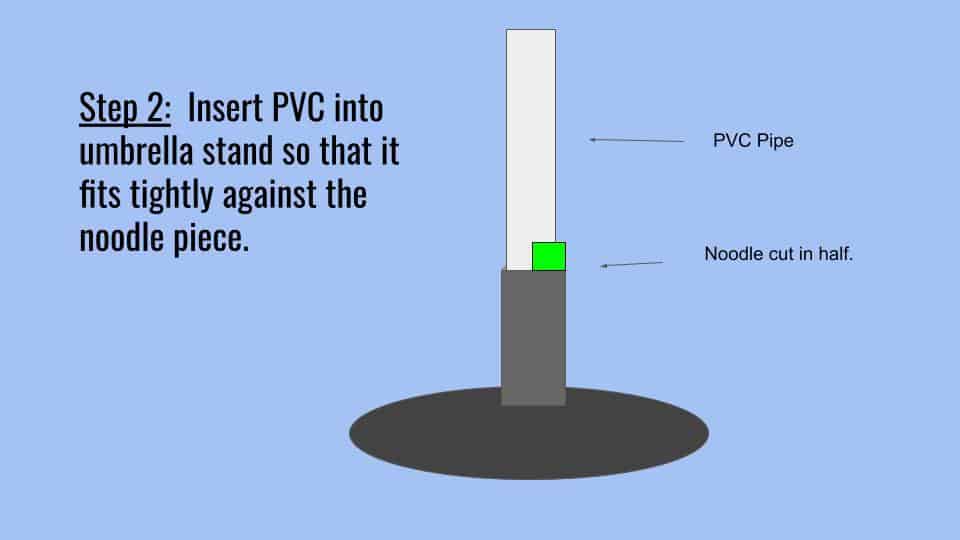
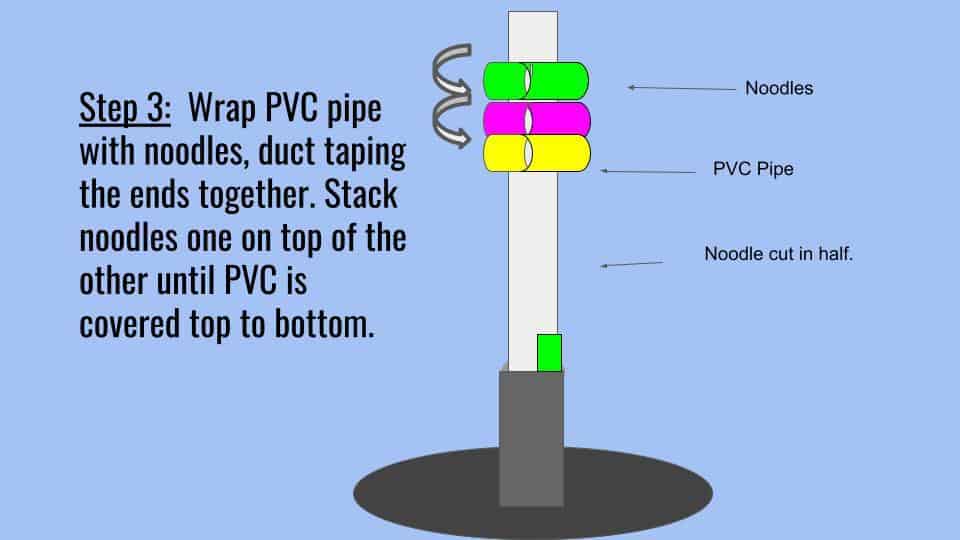
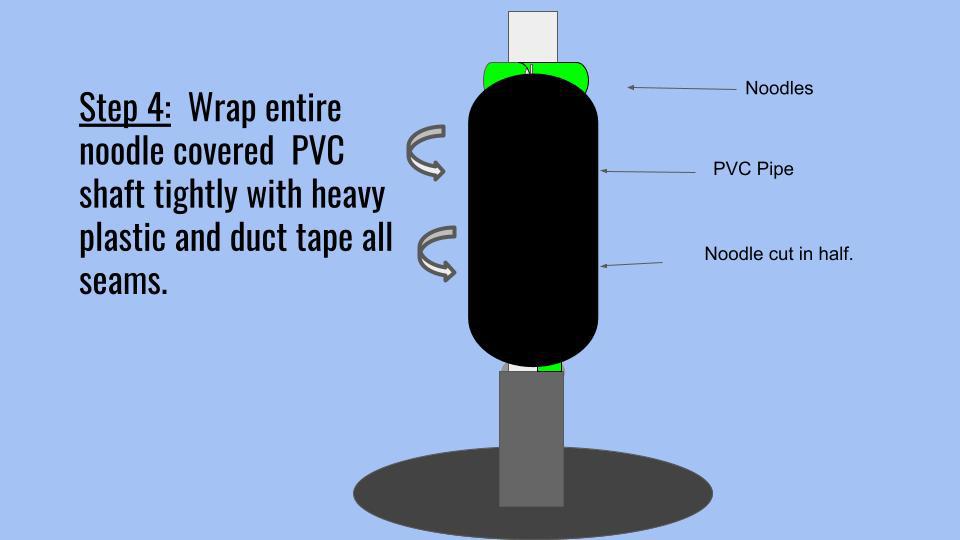
Make Your Own Free Standing Punching Bag in Five Easy Steps
Materials Needed:
- Outdoor umbrella stand- the heavier the better
- 6 foot PVC- one inch in diameter
- 15 pool noodles ( the dollar store is your best source)
- Roll of duct tape
- Roll of heavy duty plastic sheeting
- 2-4 sandbags
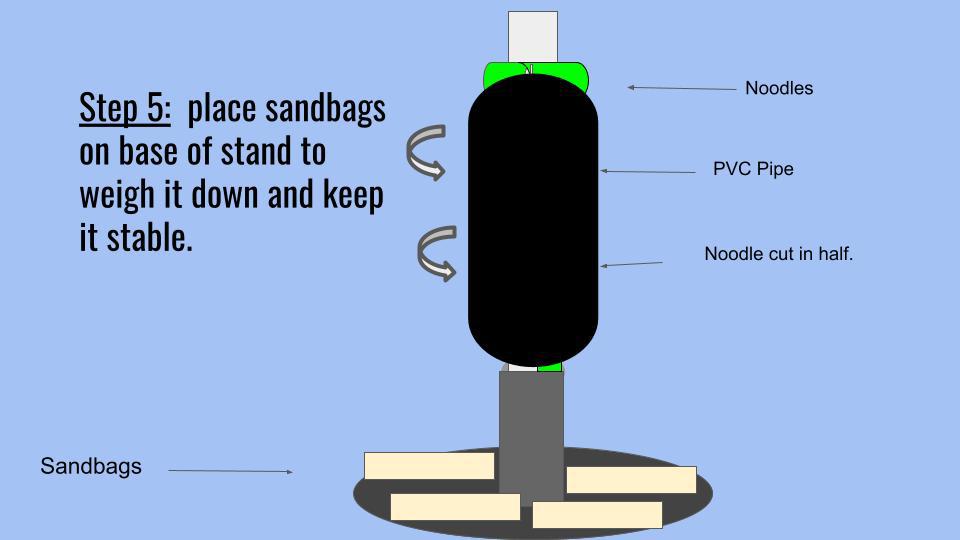
After completing Step 5, you are ready to start training! Remember to warm up and stretch before any boxing or kickboxing session…even when it’s in your own home. Be sure to wear hand wraps and gloves to protect your hands. This will be especially important when using a homemade punching bag.
If you would prefer a hanging bag, read on!
Make Your Own Hanging Punching Bag For Less Than $40
You’ll see a lot of tutorials on the internet showing you how to make your own punching bag, but they never show you how to attach a hanging mechanism correctly. This is because attaching a chain or a rope that will be sturdy enough to withstand the abuse you are going to give that bag is NOT easy.
If you just tie a rope around the top of a stuffed duffle bag as most tutorials suggest, that rope will become loose very quickly. Between the gravity pulling that heavy bag down and you clobbering it on the daily, there’s just too much working against your hand tied knots. So instead, here’s a much easier, faster, and sturdier way to make your own punching bag for under $40.
Material Needed:
- This unfilled punching bag– click the link to buy
- A big pile of old clothes, sheets, towels, rags, pillows, etc. – (get them at yard sales or thrift stores) and/or an old yoga mat rolled up, bags of soil or sawdust
- One eye bolt screw
Step One:
Buy your unfilled punching bag for less than $25 and wait for it to arrive in the mail.
Step Two:
Fill your punching bag. If you have an old yoga mat, roll it up and stuff it into the bag lengthwise, then stuff clothes, sheets, etc. around it, using a baseball bat to pack it in as tightly as you can.
If you have bags of soil or sawdust, stack them on top of each other inside the punching bag being sure to stuff the clothes all around the outside of the bags of soil as you go, packing it tightly. These punching bags can hold about 44 pounds so if you are using bags of soil, you’ll want to weigh them beforehand so that your punching bag doesn’t get too heavy.
Step Three:
Hang your bag! Now that your punching bag is filled, you are ready to hang it. The best thing about making your own punching bag out of this unfilled bag is that it is designed with four rivets and a mount chain for quick, easy, and sturdy installation. This bag also comes with a locking clip to connect the chain to a ceiling hook.
How to hang your punching bag in four easy steps:
1. To hang your bag securely you will need to find a stud beam in your ceiling that is at least 26 inches away from any walls.
2. Drill a starter hole for your eye bolt screw into the beam or stud in the ceiling.
3. Turn the eye screw into the starter hole until tight.
4. Once eye bolt is secure, attach the chains at the top of the punching bag to the lock clip, then attach the lock clip to the eyebolt.
You are ready for action!
You can also hang your punching bag from a strong tree branch with a rope, or from a pull up bar. If you use a pull up bar, you will have very little room to maneuver around the bag so consider this only as a last resort.
Inexpensive Alternatives to Punching Bags
If building one of these punching bags seems like it isn’t going to work for you, there are a few alternatives.
One of the major benefits of hitting a punching bag is that it provides the resistance to build muscle strength. This is something shadow boxing (punching in the air) cannot do for you.
So if you want to train and build muscle strength without using a bag, here are a few inexpensive pieces of equipment you could purchase instead.
Punch Mitts
If you have a a partner to train with, you could buy punch mitts. Punch mitts are thick pads fixed to a glove that can be used as a target for punching. Punch mitts are more often used for boxing, rather than kickboxing. You can purchase a decent set of punch mitts for as little as $10.
Kick Pads
If you are a kickboxer, you will be better served by kick pads rather than punch mitts. Kick pads are larger rectangular pads that way approximately 3-10 pounds. These pads are more often used in kickboxing as they are designed to take kicks, punches, and knee strikes. Kick pads can be purchased for as little as $20.
Wrist and Ankle Weights
If you don’t have a partner, another option to build muscle strength when training would be to wear wrist and ankle weights while shadow boxing. Although wrist & ankle weights won’t give you the same workout that you get from making contact with a punching bag, the resistance they provide will definitely help you gain some strength and power. You can purchase a decent set of these for around $20.
If You Decide to Break Down and Pay For a Punching Bag
Here are two great quality punching bags that are in the lower price range for bags.
If you have $100 you can get this brand new hanging punching bag delivered right to your house. It’s only 45 pounds, but it’s a good starter bag, and great for developing speed and accuracy.
If you have a little more to spend you can get this really awesome adjustable free standing bag for less than $200. I love this bag because it has suction cups on the bottom to keep it from sliding and a removable collar to adjust the resistance.